Tuesday, April 21, 2020

BENV - Photography of Models


Photography With Light


Below are all photos taken by following the lighting set up and background settings provided in the Week 7 pdf. Some photos were edited through photoshop to fix the background and cover any inconsistent spots. From these list of photos the best were selected to be submitted in the final assignment. 
Cardboard Model 1


Cardboard Model 2


Cardboard Model 3

Paper Model 1


Paper Model 2


BENV - Photoshop Materials

Week 8 - Photoshop with different Material Combinations


Using the skills learnt from the previous Photoshop task such as shadows, perspective warping and layering I was successful in replacing the walls and floors with different material combinations.

Photoshop of Paper Model

Original Image


I used this image and placed it in 2 different environments being a bright lit city and a grassy plain. For the urban environment i went with white concrete as the walls with a bright neon green light that runs near the bottom of the exterior wall to provide a more modern appeal to suit the background. All the windows are fitted with blue tinted glass while the ceiling shapes are placed with clear white glass to provide more visibility. The floor is covered with black tiles to contrast with the bright walls.


For the grassy plain I opted to use a dark wood for both the walls and ceiling to suit the natural setting. The base is made of grey concrete and the shapes above are made of rugged metal to differentiate from the natural wooden walls.


Photoshop of Cardboard Model

Original Image

For the cardboard model I decided to go with a cliff side next to a waterfall and used oak wood planks with a dark metal frame to hold the pieces together. There is an open balcony at the back with tinted windows above the entrance.


Sunday, April 19, 2020

BENV - Fusion 360 Application - The Space Between


The Space Between Fusion 360

The software Fusion 360 was used to develop a 3D space that would then be 3D printed face by face and put together. By following the week 5 tutorial (2.5d Shapes and Assemblies) I was successful in creating my own version of the shape shown below.


Using the application took some time to get used to but the tutorial was very clear and concise on its instructions and eventually I was able to efficiently develop my own version by expanding out on faces.

Layout of Faces

After completing the overall shape the faces are laid out by using the align tool which would then be 3D printed and pieced together smoothly as all the extrusions and intrusions of each face matched to the corresponding slots.

Exporting the layout as a PDF and transferring it to the Adobe Illustrator Laser Cutter Template. The pieces would be cut out and easily pieced together if there was access to the uni laser cutting equipment.


Paper Model of Fusion 360 Model


I decided to add 2 large horizontal windows in the front face to open up the space lighting up the main area while having a back facing window and door in the back area. 

Friday, April 10, 2020

BENV - Fusion 360 Initials Model

Week 7 & 8 - Fusion 360 3D Shapes


Sketch 1 (V)

Sketch 2 (J)

Sketch 3 (N)


 From the 3 sketches of the letters using the tool "loft" the general shape is made based on the selected faces. A hole is then easily made 2mm from the edges of each sketch and hence the unique shape is made.

Left Face

 Right Face

 Elevation Shot

Elevation Shot 2

Rendering


By experimenting with the different textures from fusion 360 the shape gains more realistic properties. I used the gold polished material and changed its colour to a light blue for the outer face while the interior uses a granite material. 


Monday, April 6, 2020

BENV - Model Drafting

Draft Drawings

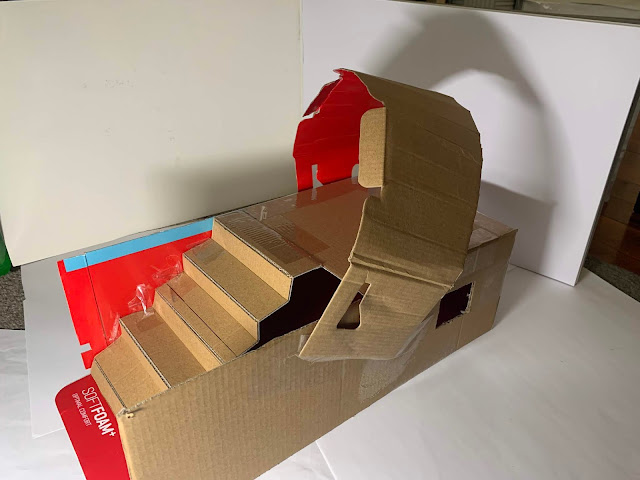
The general improvements to the design of my room is the addition of the side balcony made from a masu box, the x-form span and the spiral fold to introduce unique shapes into the area. There are more windows placed into the walls to improve on the lighting and the walls are made curvy rather than kept as a regular square.

Fusion 360 Model Design


The model is a very generic shape of being a cube so it made it easy to follow the tutorial for fusion 360. Adjusting to the new program took some time and practice but eventually i got the hang of it. Later the improvements to the model being the balcony and unique shapes were added.

Room Scale 1:20 Original Size (3mx3mx3m)


2nd Attempt at Improved Model


The 2nd attempt at making an improved model was done through paper instead of cardboard to allow for more folding techniques to be used. The shape is modified to be less uniform and more windows are placed to allow more light into the area. On the top there are folding techniques used to create patterns in the light.



Wednesday, April 1, 2020

ARCH - Cross Mass Elements

One Point Perspective Drawings

One point perspective drawing of initial draft cross


Mass Elements


Theory of Movement
Words: flexible, easy, circulation, insight, human body

The development of circulation through architecture requires both an understanding and insight on the connection between the human body in relation to its landscape. By having a flexible plan, efficient alterations in designs allow easy movement throughout the area.


https://news.harvard.edu/gazette/story/2016/08/design-for-movement/